Configuring the OCI Object Storage Connection in BICC: A Practitioner's Guide
Why This Matters
Business Intelligence Cloud Connector (BICC) is how most Fusion Applications data leaves the tenant for downstream reporting, data warehousing, and integration workloads. By default, extracts land in UCM — fine for quick, ad hoc pulls, but not built for automation at scale. Pointing BICC at an OCI Object Storage bucket instead turns that extract pipeline into something S3-compatible, script-friendly, and ready to feed OIC, ODI, Data Transforms, Autonomous Data Warehouse, or a third-party ETL tool without anyone manually downloading files from Scheduled Processes.
This guide walks through configuring that OCI Object Storage Connection on the BICC side — the piece that has to be right before anything downstream can consume the extracts. It assumes you already have an OCI tenancy and Fusion Applications instance with BICC enabled; it does not cover the downstream OIC pickup, which is its own article.
Architecture at a Glance
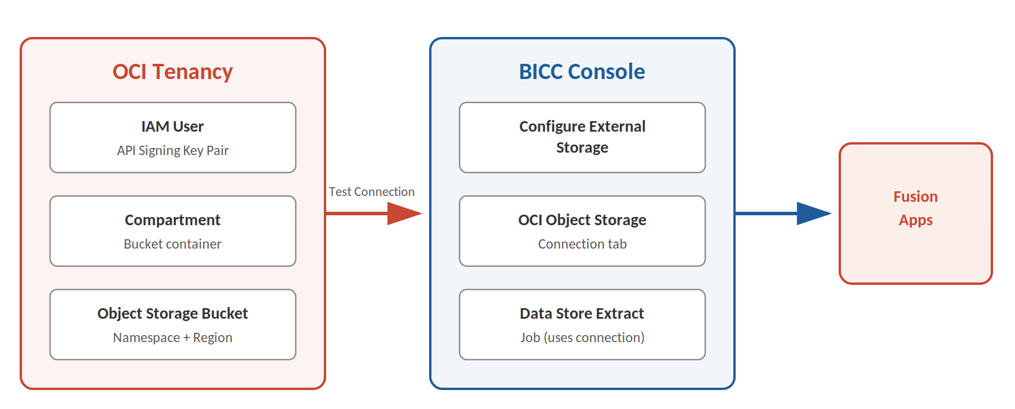
Before touching any screens, it helps to see how the pieces relate. BICC doesn't talk to Object Storage using your Fusion Applications credentials — it authenticates as a distinct OCI IAM identity, using an API signing key pair, against a bucket that lives inside a compartment you control.
Prerequisites
• An active OCI tenancy with permissions to create compartments, buckets, and IAM users/policies
• A Fusion Applications instance with BICC provisioned (accessible via /biacm off your Fusion URL)
• A user with the BI Cloud Connector Configuration role in Fusion (or equivalent) to access the BICC Console
• OpenSSL, or an equivalent tool, to generate an API signing key pair
Step 1: Prepare the OCI Side
1.1 Create a Compartment and Bucket
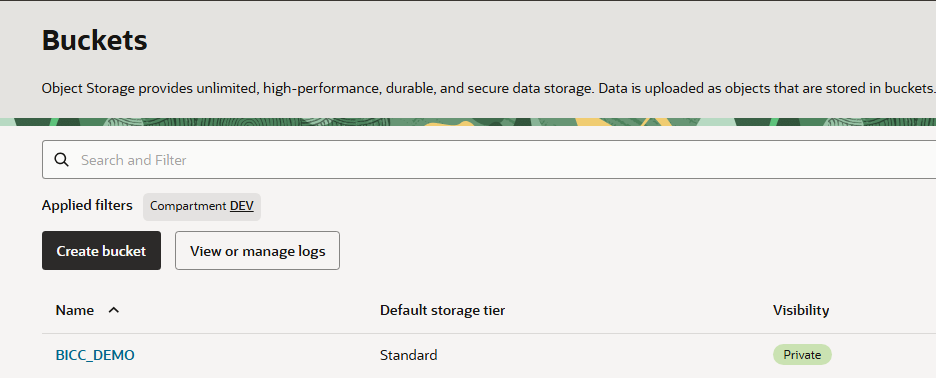
Buckets can't be created without a compartment, so this comes first if you don't already have one dedicated to integration workloads. In the OCI Console, navigate to Identity & Security > Compartments, create a compartment scoped to this purpose (something like bicc-extracts keeps intent obvious to whoever inherits the tenancy later), then go to Storage > Buckets and create a bucket inside it.
1.2 Create a Dedicated IAM User
Resist the temptation to reuse your own OCI user for this. A dedicated service account makes policy scoping and later auditing far less painful, and it's the pattern Oracle's own reference material recommends. Create the user under Identity & Security > Users.
1.3 Write a Policy Granting Access to the Bucket
The IAM user needs explicit permission to manage objects in the target bucket, scoped to the compartment you created. A minimal policy statement looks like:
Allow group BICC-Service-Accounts to manage objects in compartment bicc-extracts
Group the service user rather than granting the policy directly to the individual user — it costs nothing extra and saves a rewrite the day a second BICC environment needs the same access.
Step 2: Configure the Connection in BICC
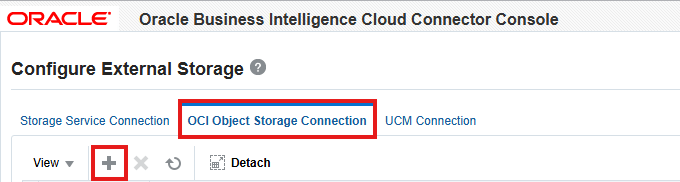
With the OCI side ready, open the BICC Console (append /biacm to your Fusion Applications URL) and navigate to Configure External Storage > OCI Object Storage Connection tab.

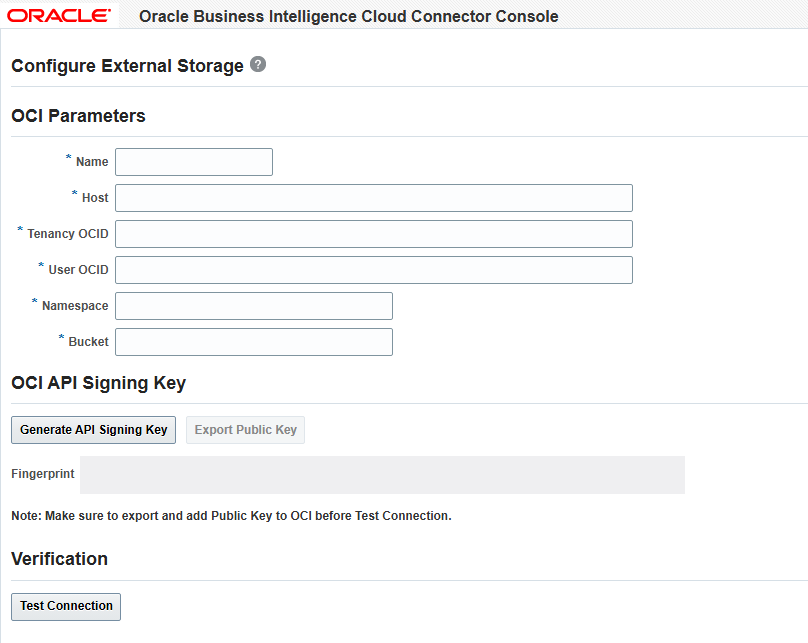
Fill in the connection parameters using the details captured in Step 1:
|
Field |
Where to find it / what to enter |
|
Connection Name |
Any descriptive name — this is what downstream tools
(OIC connections, Data Transforms, ODI) will reference, so make it
meaningful. |
|
Namespace |
Your tenancy's Object Storage namespace, found on the
bucket's details page in the OCI Console. |
|
Bucket |
The bucket name created in Step 1.1. |
|
Region |
The OCI region hosting the bucket (e.g. us-ashburn-1). |
|
User OCID |
The OCID of the dedicated IAM user, not your own
personal account. |
|
Tenancy OCID |
Found under Administration > Tenancy Details in the
OCI Console. |
|
Fingerprint |
Click on Generate API Signing Key and Export Public Key |
|
Private Key |
The private key content, in PEM format — BICC will
reject a key in any other format. |
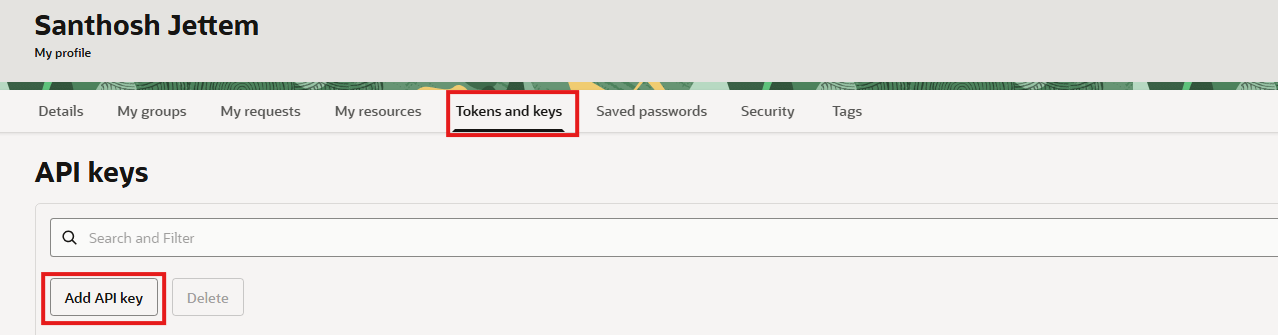
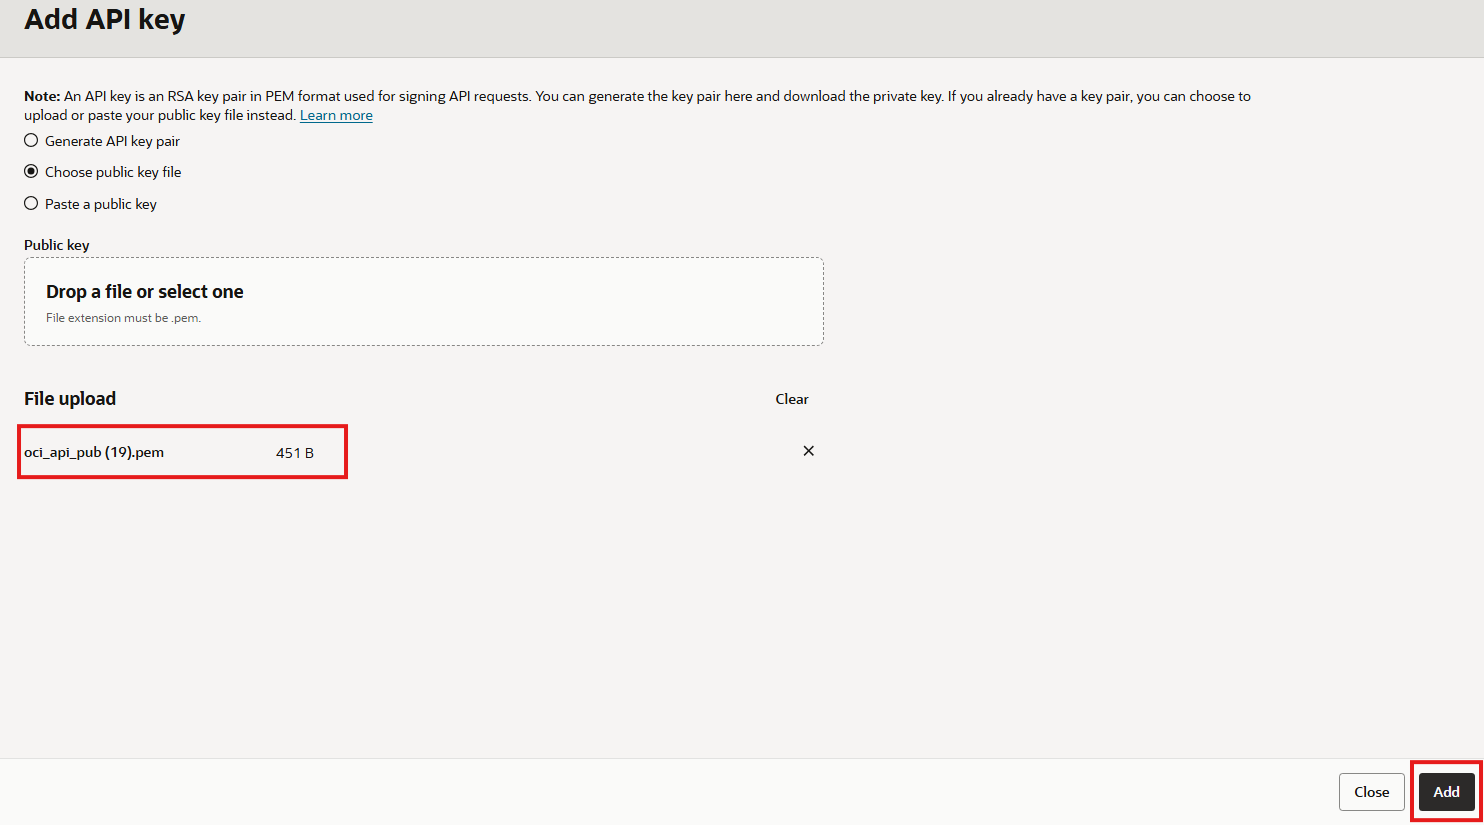
Get into OCI user profile created in step 1.2 and Add API Key *.pem file generate in BICC console.
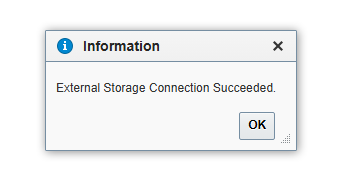
Click Test Connection. A successful test confirms BICC can reach the bucket and authenticate with the supplied key
Gotchas Worth Knowing Before You Start
Federated Users Aren't a Reliable Shortcut
If your OCI tenancy uses federated identity (SSO through an external identity provider), be aware that using a federated user for this connection has historically produced inconsistent results. The dedicated local IAM user with its own API key remains the more reliable path — one more reason to set one up rather than reuse an existing identity.
Retention Rules Can Silently Break Extracts
BICC's extract mechanism relies on renaming files as part of its processing lifecycle. If the target bucket has an Object Storage retention rule applied, that rule can block the rename operation, and extracts fail in a way that isn't obviously connection-related. If extracts intermittently fail after the connection tests fine, check the bucket's retention rule configuration before troubleshooting the connection itself.
Incremental Extract Windows Default to 24 Hours
By default, incremental extracts pull everything changed in the last 24 hours. If your extraction schedule runs less frequently than that, or you need a wider or narrower change-capture window, adjust it under Manage Offerings and Data Stores > Actions > Extract Preferences > Prune Time in Minutes. This is easy to overlook because it's configured well away from the connection screen itself.
Common Connection Errors and What They Usually Mean
|
Field |
Where to find it / what to enter |
|
[BIACM0163] Invalid Connection
for External Storage |
Verify every field against the OCI Console values —
this is the generic failure and covers everything from a wrong namespace to a
mismatched fingerprint. |
|
[BIACM0145] Invalid connection
for OCI Object Storage |
Check the private key format first (must be PEM); this
error also appears when the IAM user lacks policy access to the bucket. |
Wrapping Up
The connection setup itself is a short form to fill in, but almost every failure traces back to something configured outside that form — a missing policy, a key in the wrong format, a retention rule on the bucket, or a federated identity that doesn't play well with API key auth. Get the OCI-side prerequisites right first, and the BICC connection screen becomes the formality it's meant to be rather than the source of the troubleshooting.
Once this connection tests clean and extracts are landing in the bucket, the natural next step is wiring OIC (or your ETL tool of choice) to pick those files up.