Your First Agent: Build, Test, and Deploy a Simple Skill
Series #1: AI Agent Studio for Fusion Applications — A Practical Developer's Field Guide to Enterprise AI Agents
(Post 2 of 5)
Post 1 covered the vocabulary, the architecture, and the extend-vs-build decision — all useful, none of it hands-on. This post fixes that. We're going to open AI Agent Studio, copy a template, configure it into something narrower and more deliberate, run it through the built-in testing tools, and publish it.
The goal here isn't a sophisticated agent. It's a complete round trip — build, test, deploy — on something small enough that the mechanics of the tool are the only thing you have to think about. Once this flow is familiar, scaling it up to something production-worthy in later posts is a much smaller jump.
What We're Building
To keep this generic and reusable regardless of which Fusion pillar you work in, we'll extend a single existing topic on a pre-packaged agent template rather than designing something from scratch. Specifically: take an out-of-the-box agent, copy it, narrow its scope to one clearly defined topic, attach one tool, and add instructions tight enough that it refuses to wander outside that topic.
That refusal behavior — the agent correctly declining to answer something outside its defined scope — is actually the most important thing to verify in this entire walkthrough. It's the difference between a scoped, trustworthy agent and one that quietly guesses.
Step-by-Step: From Template to Draft
Here's the full path from opening the tool to having a saved, unpublished draft.
|
# |
Step |
What you're
actually doing |
|
1 |
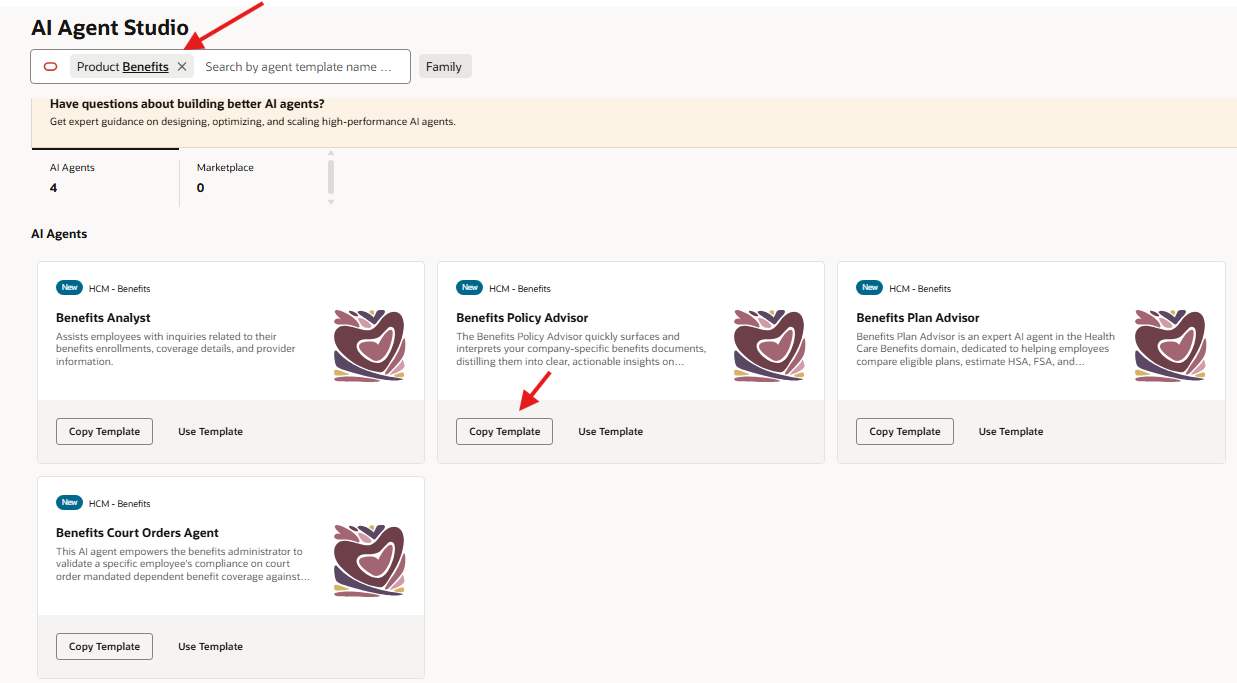
Navigate to
AI Agent Studio |
Navigator →
Tools → AI Agent Studio. This opens the catalog screen with pre-packaged
agents, a search bar, and Family/Product filters. |
|
2 |
Filter to
find a starting point |
Use the Family
or Product filter to narrow the catalog down to something close to your use
case. For this walkthrough we're picking Benefits Policy Advisor under HCM Family. |
|
3 |
Copy the
template |
Select an agent
and choose Copy Template (rather than Use Template) — this creates an
editable, independent version under your own name instead of modifying the
shared original. |
|
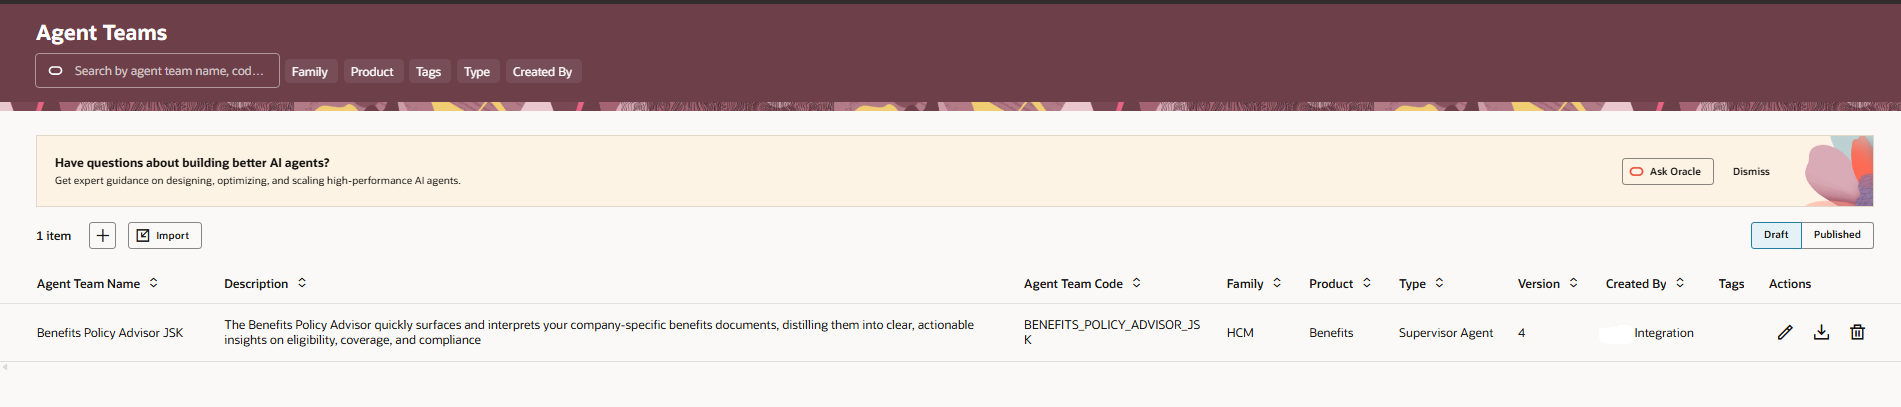
4 |
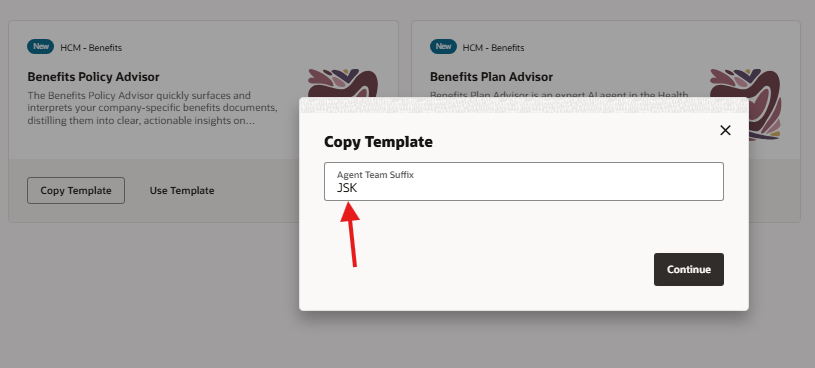
Apply a
naming convention |
Rename your
copy with a clear suffix (e.g. “– Sandbox” or your initials). Trivial, but
it's what stops your tenant's agent list from becoming unmanageable after a
few months. |
|
5 |
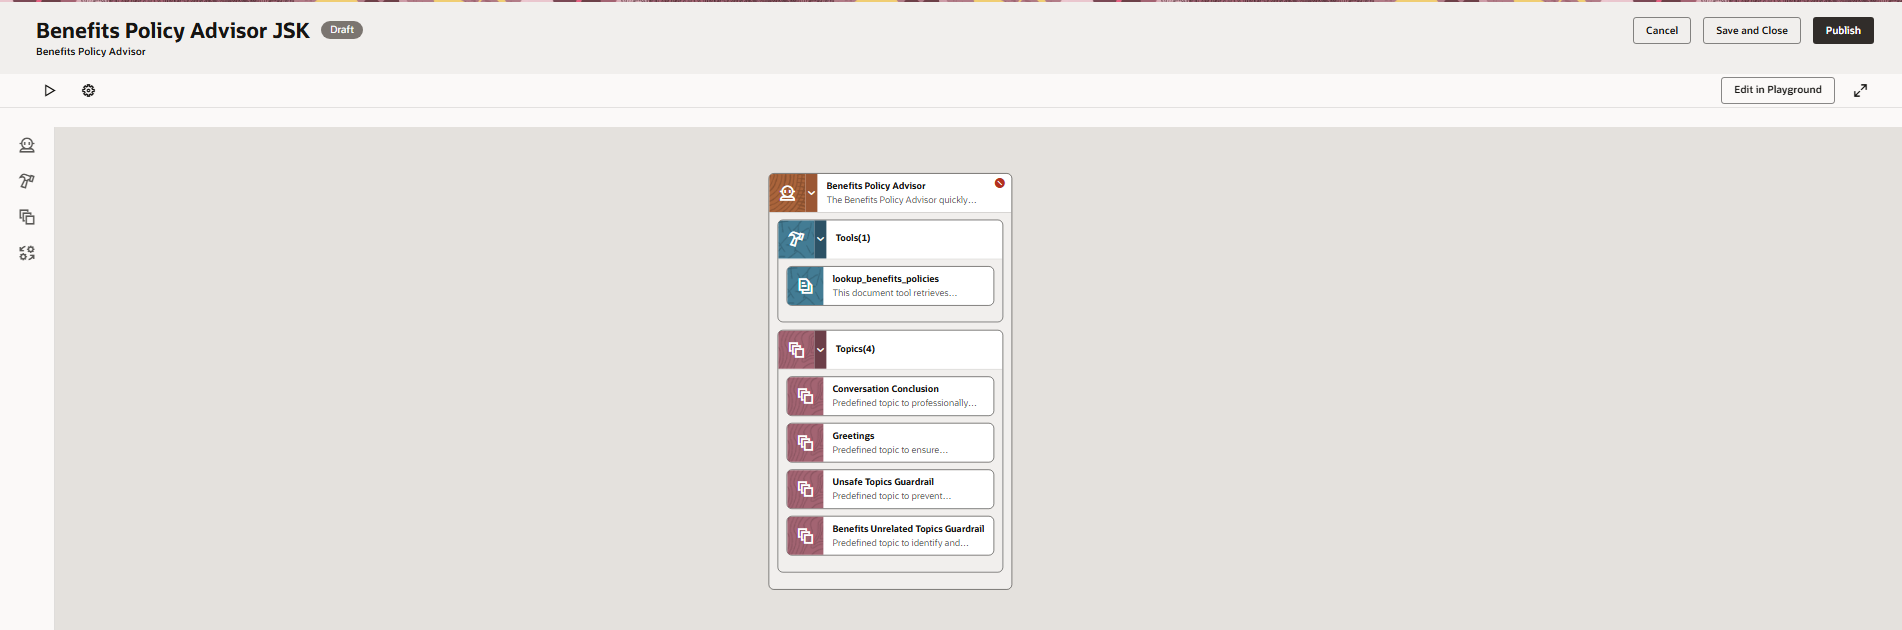
Define or
review Topics |
Topics set the
boundary of what the agent is allowed to talk about. If you're starting from
a template, review what's already defined; if building new, write at least
one topic that scopes the agent to a single, narrow area. |
|
6 |
Write
Instructions |
Inside each
topic, write the natural-language rules that guide the agent's behavior
within that boundary — this is the prompt-level guardrail layer from Post 1's
architecture diagram. |
|
7 |
Attach a
Tool |
Every agent
needs at least one tool to do anything beyond converse. Attach a Business
Object tool for structured Fusion data, or a Document Retrieval (RAG) tool if
the answer depends on unstructured policy documents. |
|
8 |
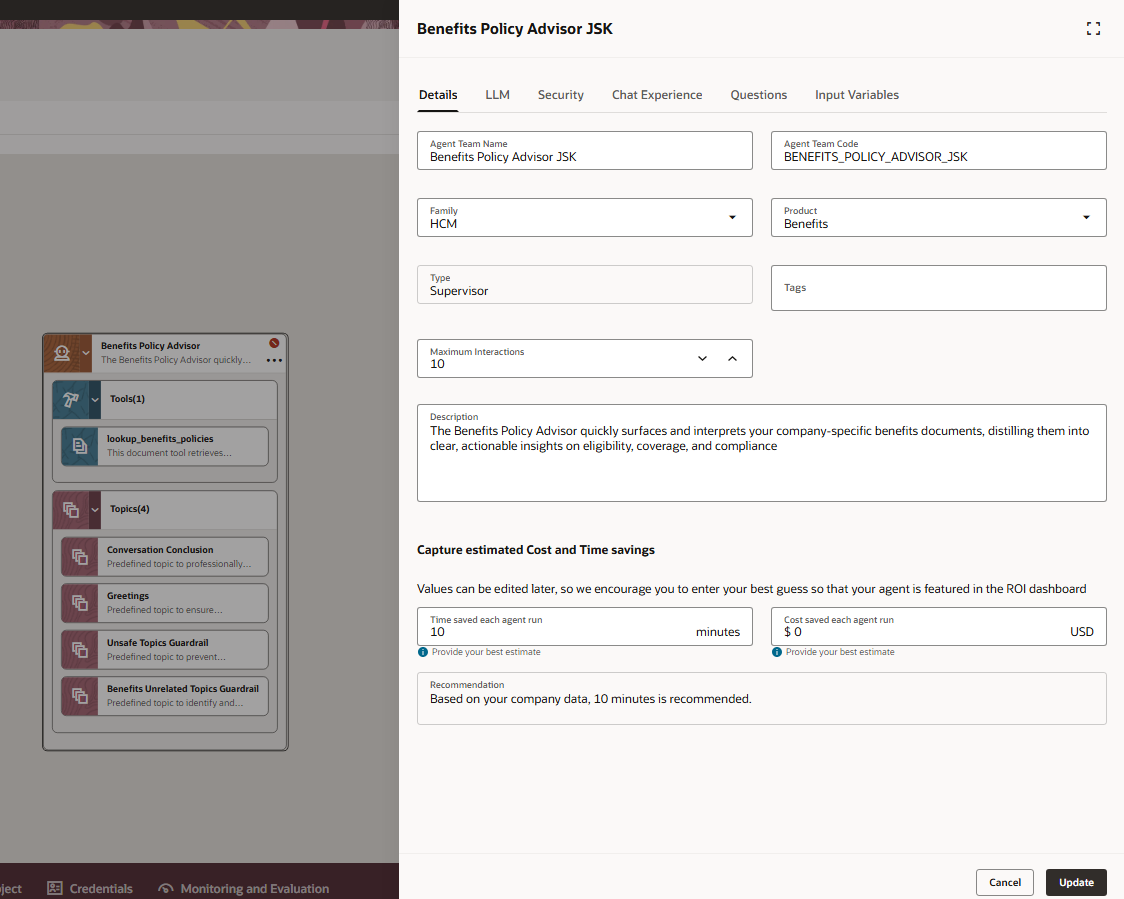
Choose an
LLM provider |
In Agent Team
settings, pick the underlying model. Available options vary by tenant and
update over time, so confirm what's currently offered before assuming a
specific model is available to you. |
|
9 |
Set security
roles and starter questions |
Define which
Fusion roles can access this agent, and add a few starter questions — these
double as your first manual test cases. |
|
10 |
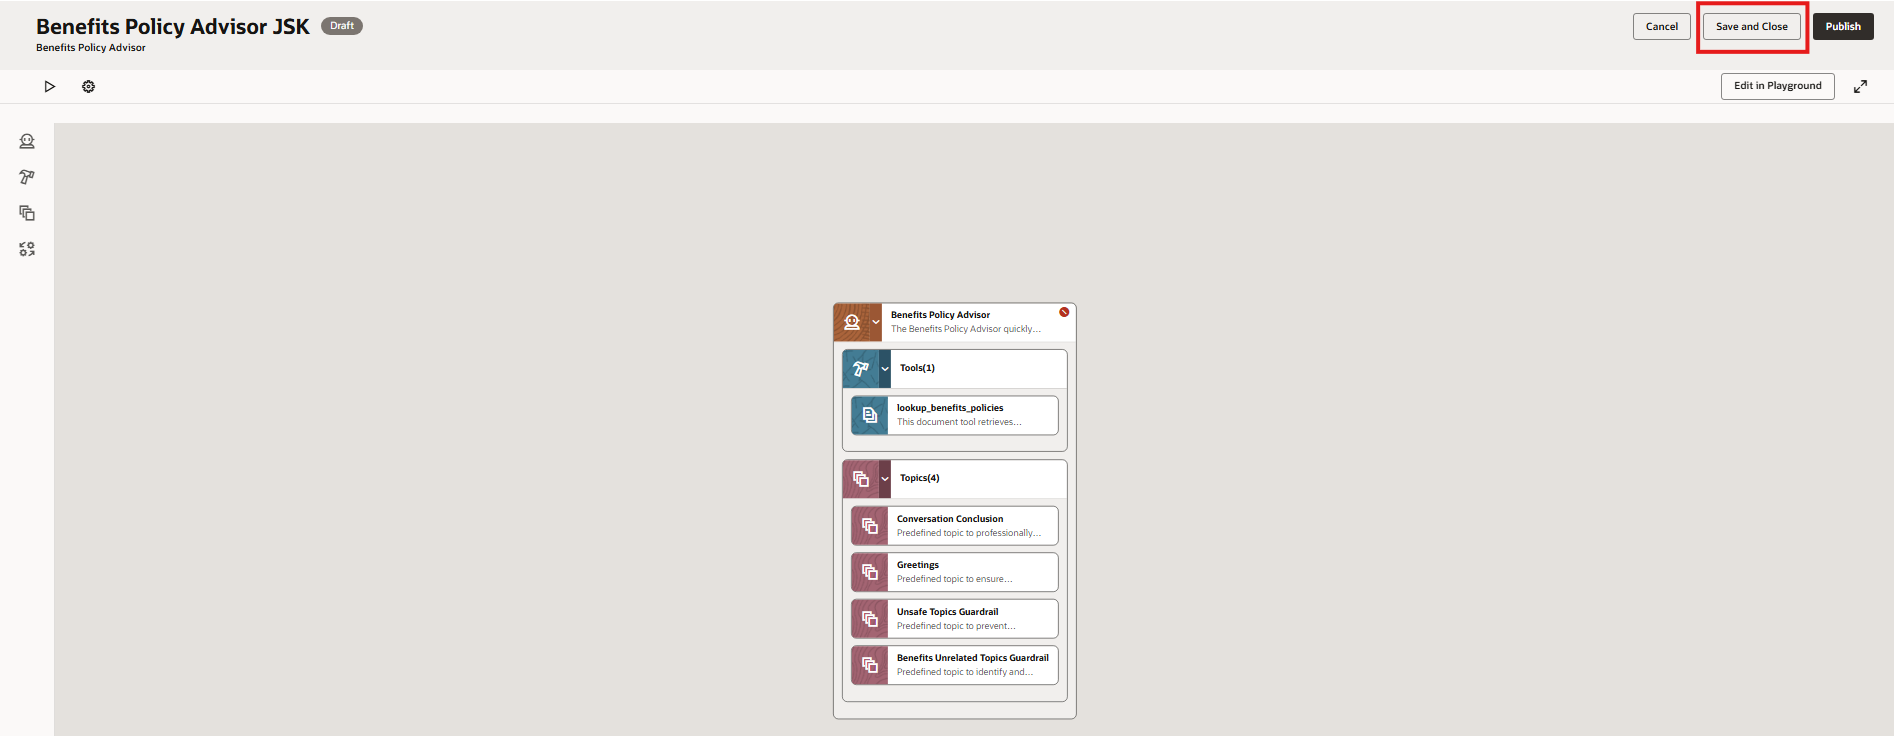
Save as
Draft |
Save without
publishing. A draft is invisible to end users and safe to iterate on — this
is the gate before anything reaches Testing. |
|
A note on scope discipline It's tempting to attach three or four tools and cover
several topics on a first build, since the tool makes it easy to do so.
Resist that. A narrowly scoped agent is dramatically easier to test
meaningfully — and the testing step below is where that decision either pays
off or costs you time. |
Testing Before Anything Goes Live
Once your agent is saved as a draft, AI Agent Studio's built-in debug mode lets you run it without publishing. This is where you find out whether your topics and instructions actually constrain behavior the way you intended — and it's worth treating as a real test pass, not a quick sanity check.
A useful test set covers three categories:
• In-scope questions — the starter questions you wrote in Step 9 are your minimum bar here. The agent should answer correctly and cite the right underlying data.
• Boundary questions — something adjacent to the topic but just outside it. This is where weak instructions show themselves; a well-scoped agent should recognize the question is out of bounds and say so rather than improvising.
• Adversarial-ish phrasing — the same in-scope question worded awkwardly or indirectly. If the agent only works when questions are phrased exactly like your starter questions, the topic's instructions are too narrow or too literal.
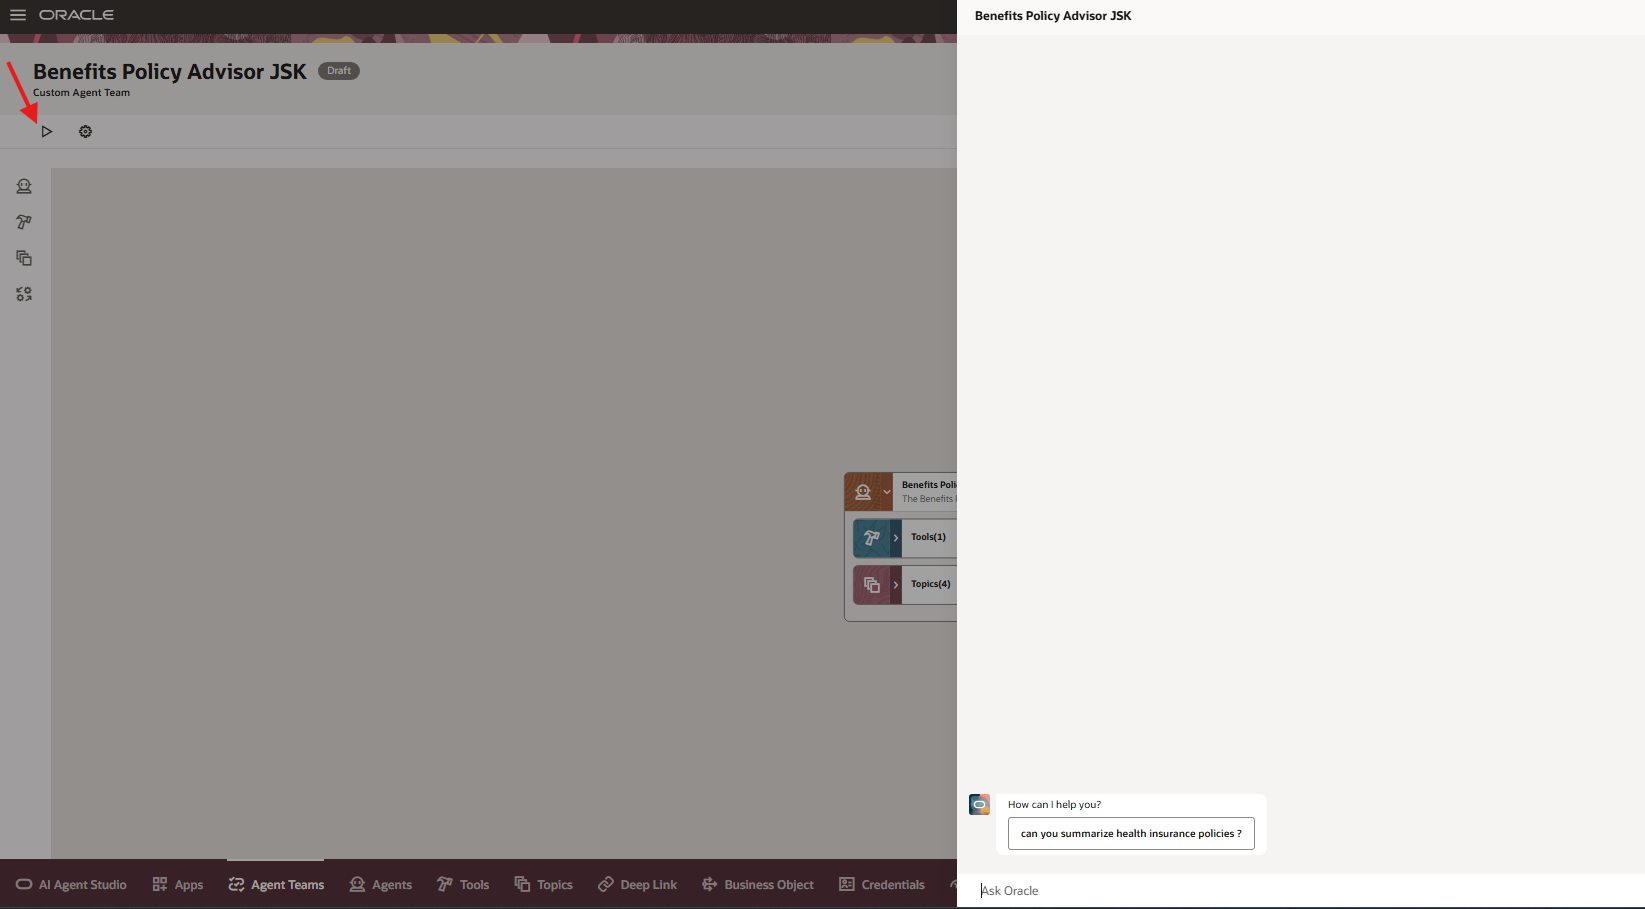
Pay attention to what the debug view shows beyond the final answer. AI Agent Studio surfaces the reasoning path the agent took to get there — which tool it called, what it retrieved, and how that fed the response. Reading that trace, not just the answer text, is how you catch an agent that got the right answer for the wrong reason — which is the kind of thing that fails quietly in production later.
|
If the agent answers
outside its topic Don't immediately add a broader instruction telling it
what not to do — that approach scales badly. Instead, tighten the topic's own
definition first. A precisely scoped topic generally needs fewer negative
instructions than a loose one patched with exceptions. |
Publishing
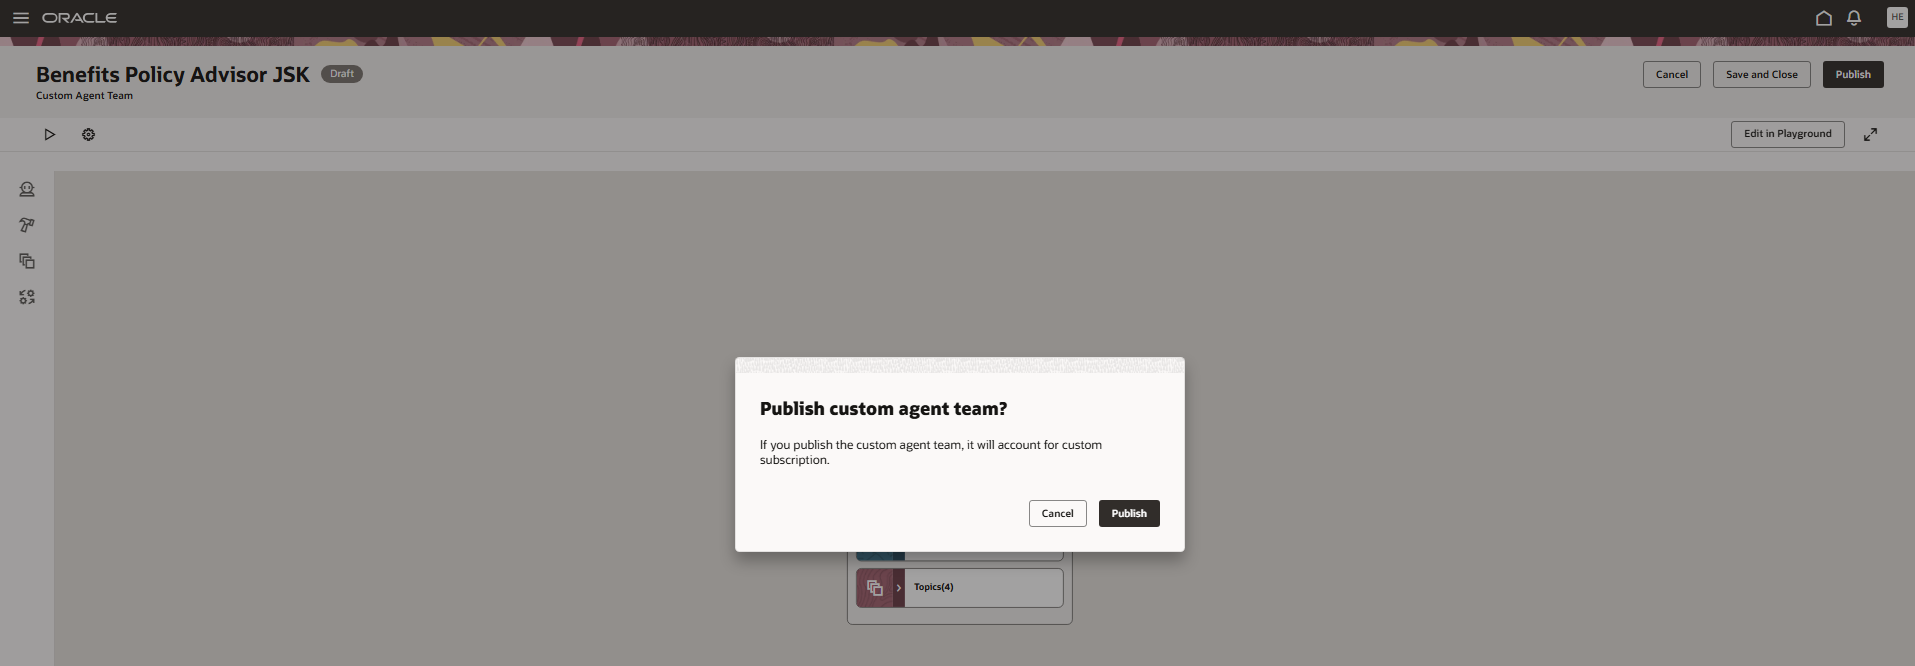
Once testing holds up across all three categories above, publishing makes the agent available to the security roles you configured in Step 9. There's no separate, complicated release process beyond that — the deliberate work happened in configuration and testing, not in the publish step itself.
Worth one last check before publishing: re-confirm the security roles. It's an easy field to forget after spending most of the session focused on topics and tools, and it's the one setting that directly controls who can actually reach this agent once it's live.
What This Post Didn't Cover
This build deliberately used a single tool and a narrow topic. Two things were intentionally out of scope here, and both get dedicated treatment later in the series:
1. Post 3 — grounding an agent properly against real knowledge sources, including the tradeoffs between Business Object tools and Document Retrieval (RAG).
2. Post 4 — coordinating multiple agents into a full agent team with a supervisor pattern, rather than the single-agent build done here.
Over to You
If you've run through this build yourself, the most useful thing to compare notes on is the boundary-question test — what happened when you asked your agent something just outside its topic? That answer says more about your configuration than the happy-path questions do.
Next up: Post 3, where we get serious about grounding agents in real data.